

I picked up Zoe Francois and Jeff Hertzberg’s brilliant book a few months ago, and I can honestly say I haven’t bought a baguette since.
As I’m sure most Italians would agree, bread elevates nearly every meal. A bowl of soup or a plate of pasta doesn’t quite feel right without something to soak it up. You’re not reaching for a salad in the middle of the night when you’re suddenly starving. “How about a slice of cheese with some meat?” said no one ever. You need bread. That’s why it’s the most widely-consumed food in the world.

But not all breads are created equal. The bread of modern times has little resemblance to the stone-ground wheat our ancestors ate. Today, the bread found in grocery stores is loaded with emulsifiers, dough conditioners and mold inhibitors to keep it “fresh” in those plastic bags. Just take a look at the ingredients label stuck on the back.
But with a little effort, and a lot less ingredients, you can channel those neighborhood bakery days and make delicious bread at home. Even if you’re lucky to live close to a real-deal bakery, and don’t mind spending upwards of $8 for a loaf of bread, there’s nothing like baking your own bread.

As much as I cook, I figured I could totally nail this bread thing. I tried no-knead recipes on Pinterest, too often left with dense, heavy loaves, as well as the old fashioned way, kneading and waiting my day away – but nothing really gave me the bread I wanted. I wanted crusty-on-the-outside, fluffy-on-the-inside airy bread of my dreams.
But finally, I have found it. In fact, now I’m a self-proclaimed bread-baking badass. And it’s all thanks to the ingenious Artisan Bread in Five book.
When I said that earlier I haven’t bought a baguette, I wasn’t kidding. I almost wanted to name this post The Best Bread You’ll Ever Have, but I didn’t want to turn you off. Now that you’ve made it this far I can definitely tell you this bread will be among the best of breads you’ve ever had!
When my bread comes out of the oven, I listen for it to “sing,” as the brilliant bread-masters put it, which is when a loaf is perfectly baked. It crackles so beautifully that I often call Matt to come over and listen to my bread. “Can you hear it?! You can hear it all the way from here!!”
That’s a real thing I do.

I proudly make this bread on a weekly basis. I have zero problems going through all that two-weeks-worth dough. I often bake a few at a time and freeze them once they’ve completely cooled, so I usually have a loaf I can take out for dinner.
While it does really take just five minutes to throw it together, don’t expect you’ll be eating bread that same day. But once you get the hang of it, you can easily expect a freshly baked loaf for dinner whenever you want.
You throw this no-knead dough together with just flour, salt and yeast, and let it rise in a bucket for a few hours before refrigerating it overnight. The next day, you take out a grapefruit-sized piece of dough from your bucket, quickly shape it, let it rise, and pop it in the oven for 30 minutes.
That’s it. And as for what to eat with it, your options are endless. Need some ideas? Try it with my go-to red sauce, serve it with lunch or dinner, make a sandwich on it, eat the entire baguette in one sitting — it’s all delicious.
Artisan Bread in Five by Jeff Hertzberg
I highly suggest purchasing the book if you are serious about never buying bread again – as there is a bit of an art to this. I’ve outlined the basic recipe here, but the book offers an extensive FAQ section, tons of additional recipes for amazing variations like bagels, flavored breads, whole wheat varieties and pizza (although my simple pizza dough is still my go-to). You can also find the book online.
You’ll need a bread stone, a pizza peel, a small broiler tray and a large (5 qt.) bucket or bowl with a lid.
- 6 1/2 cups of flour
- 3 cups of water
- 1 tbsp active dry yeast
- 1 1/2 tbsp salt
- Add yeast and salt to water in a large bucket or bowl with a lid
- Add flour, using the scoop and sweep* method to measure.
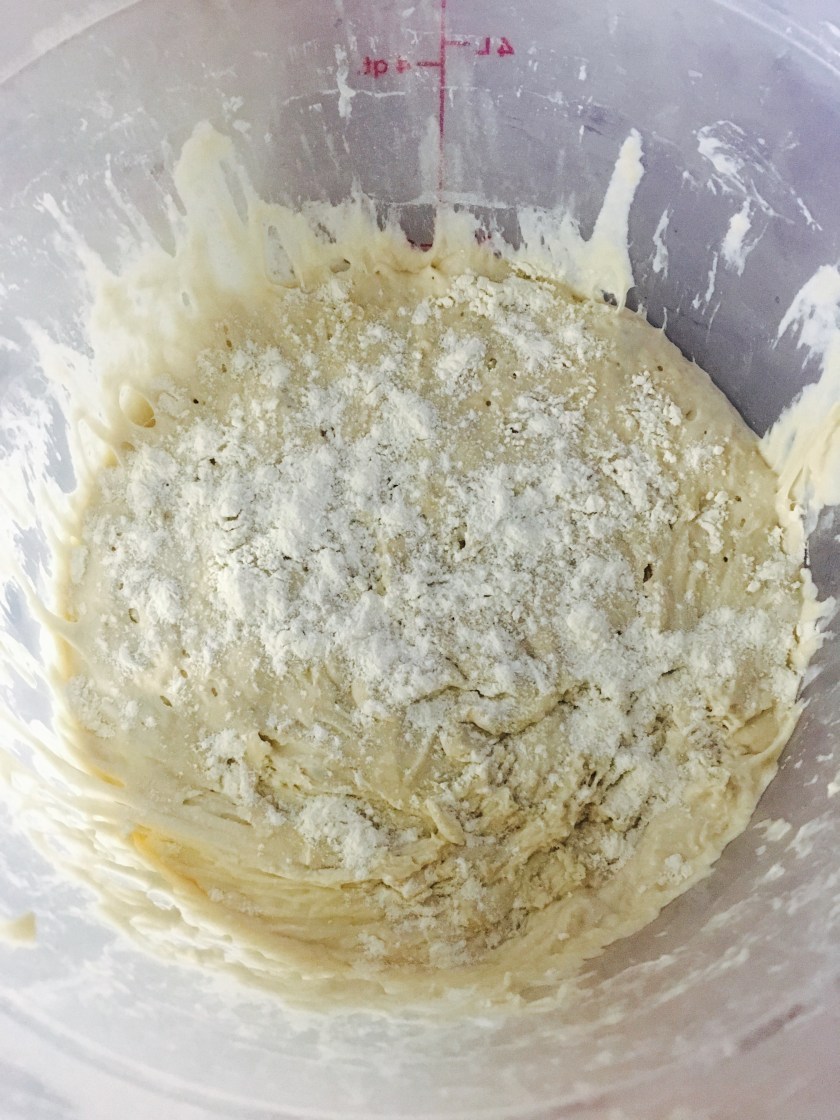
- Mix to incorporate – do not knead! Just want to achieve an even consistency. I bought a Danish dough whisk for this, you can also use a wooden spoon or your hands
- Depending on the temp of your house, let rise loosely covered for about two hours on the counter.
- Still loosely covered, move to fridge overnight.
- The next day, take out the dough, and lightly flour the top of your dough before taking out a grapefruit-sized piece. Use a serrated knife or kitchen shears.
- With the stone inside – in the center of oven – preheat to 500° and place a small broiler or oven-safe tray under the stone on the rack below.
- Prepare your pizza peel by sprinkling a layer of flour on top.
- Moving fast with well-floured hands, cloak* the dough in just 20 seconds or so – do not knead. Wrap the dough around itself until you have a smooth dough ball, as pictured, and place on pizza peel to rise.
- Place dough back in the fridge where it shall develop flavor over the next two weeks.
- Let rise for 45 minutes. If your house is cold like mine, and if you have a huge stone like I do, shoot for up to 90. In my experience, it’s better to let it rise longer than not enough.
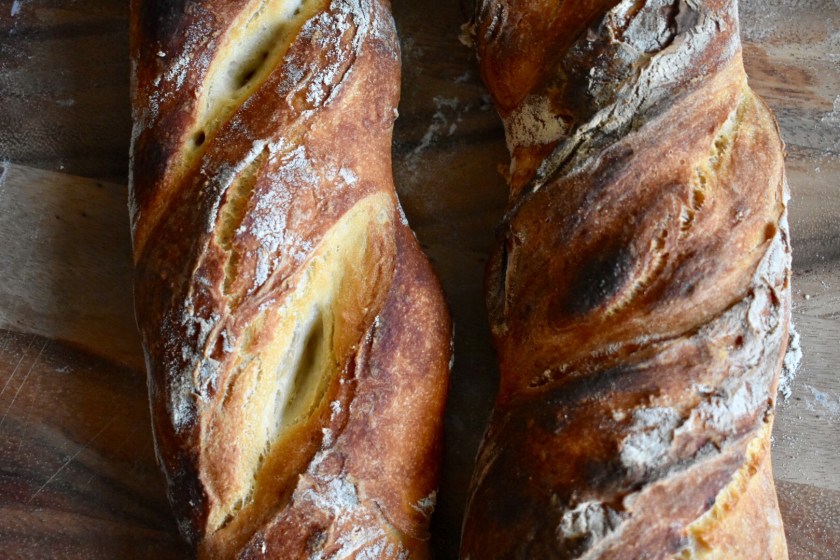
- Flour the surface of the dough before slashing it with a serrated knife. For reference, you can see in the pictures where I slashed the dough
- Now you are going to act like you’re running a pizzeria in Napoli. Moving quickly, open the oven door and place the top of the pizza peel, which as the dough on it, where you want the dough to fall – in the center of the stone. Pulling back swiftly, it should fall right into place.
- Pour 1 cup of water into the broiling tray and close oven door.
- Breathe.
- Wait 30 minutes until its dark brown. If you want a lighter colored crust, reduce temp to 450° during the last 10 minutes or so.
- As I mentioned above, when you finally take your bread out if should sing – crackling as it adjusts to room temperature.
- Let rest for at least 30 minutes before cutting into – very important.
PHEW that was a lot. You’re exhausted and you’re just reading the instructions on how to bake bread from scratch, let alone do it. But once you’ve made the dough, and tried a few times, you’ll be happy you took the plunge.
*Be sure to check out their awesome site for more tips on things like cloaking and the scoop and sweep method.


You are an amazing cooking goddess. How you create with such beautiful pieces is beyond me and frankly mind boggling. You should be on TV
LikeLiked by 1 person
Damn that bread looks so good. I’m drooling!
LikeLiked by 1 person
Pingback: Lemon & Thyme Chicken Salad | Adina Cucina
Pingback: Tomato Soup with Caramelized Fennel | Adina Cucina
Pingback: Beans & Escarole | Adina Cucina
Pingback: Simple Italian Recipes in an American Kitchen - Eat Like an Italian